I've learned to view my makeup kit as not a project that is completed, but instead an organism that is living and breathing and changing as I change. This might sound weird, but it's the only way I can see it as something that suits me for the moment, instead of something that is complete. I am still on the hunt for the perfect rolling case (I think I've found it) so for now this is my set up. Though the carrying aspect is the most frustrating thing about because I have everything stored in a set bag that is actually a crafting bag from Michael's, for now this is working. The key to keeping it from really frustrating me has been to keep like with like and in clear bags. So here we go with the breakdown...
Showing posts with label MAC. Show all posts
Showing posts with label MAC. Show all posts
Ruby Who?
Tuesday, May 28, 2013
 I'm a little late on talking about this but I still feel it is worth reviewing since Rihanna's makeup collection for MAC is still due for release. I decided to go against my trend of not ordering limited edition products from MAC and I placed an order for "Riri Woo" which is Rihanna's signature red lipstick she pre-released before her actual collection comes out this summer. I had read that it was "inspired" by "Ruby Woo," their incredibly vibrant and matte as all hell red lipstick. I had seen the hype on instagram and I am a total sucker for a good red so when I received the reminder email I decided to go for it. I personally have 2 tubes of Ruby Woo sitting in my lipstick drawer but I acted on impulse, and it turns out now I have THREE tubes of Ruby Woo because the color is almost the same exact thing! Here's my review...
I've thought long and hard about how to compare to make it sound like there's really a difference but all I can really say about them is RiRi Woo is slightly less bright, let's say it doesn't have as much of an orange underton, but instead it's a bit more blue and somewhat less matte. Really though, that's it. It's a glorified Ruby Woo so if you missed out on the pre-sale consider yourself lucky and warned. Don't get my wrong, I love the color because I think Ruby Woo is a great red that everyone should own, I just disagree with the hype surrounding the color. I have a pro card and I wasn't even able to get my discount, so spending over $20.00 for a lipstick that I already have 2 of was pretty disappointing. A red is a red is a red and I will forever be needing red lipstick but this was definitely a lesson learned for me. I think at this point the only limited edition product I completely regret not purchasing was Heroine lipstick (if you have a tube and want to trade I'M DOWN ;)
How To: Get a Pro Discount
Friday, March 22, 2013
I'm sure as beauty bloggers many of you are aware of the Pro Makeup discounts that many companies are offering for working makeup artists/cosmetologists to give us a break on product purchases for our kits. If you're not, you should know that there are cosmetic companies out there that are willing to give working makeup artists a discount ranging from about 20%-50% depending on the brand. When going through the application process for these programs you may find that if you live in a State/Country that does not require you to obtain a beauty license to be a Makeup Artist (like where I live in California), it's difficult to obtain proof of your employment if you're doing mainly freelance work. I found myself in this very situation when I was looking to develop my bridal kit and looked a bit more into the pro programs and found that there are ways to get the discount without actually being on the payroll of a profession production. And there's how I did it!
First, I googled companies that offer the program and found the one's I was most interested in, the first being the most common, MAC. The MAC pro discount program was my introduction to the process of applying to other brands, and once I had my documents for this the rest of them were a breeze to apply to. Here is a list of accepted required documents to apply to the program from the MAC website
"Provide two current pieces from the following that indicate your selected category/profession:
Composite Card, Business Card with name and specific profession, Editorial Page with name credit, Union Card, Professional License, Diploma/Certificate, Publication Masthead, Program/press Materials with name, Contract on Production Company Letterhead, Crew/Call List on Prod. Co. Letterhead, Professional Letter of Reference of Employment."
The first, easiest and most necessary item on this list and one that you should already have as a working makeup artist is the business card. You can order some cute cheap ones at Vistaprint.com, which is where I ordered mine. After I went through those though, I decided to try zazzle.com and they have a WAY better selection, however they are more expensive.
.JPG) The second item from the list proved to be the most difficult for me because all I really had as proof of my work were the pictures I had taken and testimonials from my clients. However I had been working closely with my friend who is a hair stylist, and this is where I came up with my professional letter of reference. I had her write me a letter about the work I had completed with her and because she was a licensed cosmetologist I had her write her licence number on the bottom of the letter as well as list the salon she worked out of so there would be no questions about legitimacy.
The second item from the list proved to be the most difficult for me because all I really had as proof of my work were the pictures I had taken and testimonials from my clients. However I had been working closely with my friend who is a hair stylist, and this is where I came up with my professional letter of reference. I had her write me a letter about the work I had completed with her and because she was a licensed cosmetologist I had her write her licence number on the bottom of the letter as well as list the salon she worked out of so there would be no questions about legitimacy.
Once I had these 2 pieces the rest of the work was easy, I just sent a copy of my photo ID and filled out the application form and sent a check ($35.00) for the amount of the annual fee. Keep in mind that MAC takes a VERY long time with this process. It was well over a month before I heard back from them via email that my application was received and was under review, I think it was a few more weeks after that, then I got my approval application that said I should see my card in the mail within a couple of weeks.
After I succeeded at getting the MAC pro I decided to investigate more into other brands that I love and found that the process was almost identical for a few companies and I now have pro cards for MAC, Urban Decay and Bobbi Brown.
Urban Decay's was the easiest by far, you can submit basically the same documents but they prefer it to be done via email, I was approved for my pro-discount literally the very next day. The discount amount is 40% and the only bad thing about this program is you are only allowed to use your discount online and it restricts MANY items (like no NAKED Palettes!). So it's definitely worth your time because it takes almost no time, but it still is kind of a bummer that it's so limiting. Especially since so many artists have the naked palette in their kits...
Bobbi Brown was also the same process and the discount of 40% can only be used when purchasing items online. But to my knowledge it applies to all products, which is great because their pro-palettes are in the $250.00 range with is incredibly expensive, so the discount sort of brings it down to normal range.
Currently, I am working on getting the Makeup Forever Pro card, but they do not accept the letter of reference so I'm going to look through their required documents and see what I can do to apply.

So that's my experience! Kind of drawn out but I just wanted to make you all aware that you do not have to pay full price if you are a working artist and looking to expand your kit! If you have any stories, questions or comments about this, please share.
First, I googled companies that offer the program and found the one's I was most interested in, the first being the most common, MAC. The MAC pro discount program was my introduction to the process of applying to other brands, and once I had my documents for this the rest of them were a breeze to apply to. Here is a list of accepted required documents to apply to the program from the MAC website
"Provide two current pieces from the following that indicate your selected category/profession:
Composite Card, Business Card with name and specific profession, Editorial Page with name credit, Union Card, Professional License, Diploma/Certificate, Publication Masthead, Program/press Materials with name, Contract on Production Company Letterhead, Crew/Call List on Prod. Co. Letterhead, Professional Letter of Reference of Employment."
.JPG)
Once I had these 2 pieces the rest of the work was easy, I just sent a copy of my photo ID and filled out the application form and sent a check ($35.00) for the amount of the annual fee. Keep in mind that MAC takes a VERY long time with this process. It was well over a month before I heard back from them via email that my application was received and was under review, I think it was a few more weeks after that, then I got my approval application that said I should see my card in the mail within a couple of weeks.
After I succeeded at getting the MAC pro I decided to investigate more into other brands that I love and found that the process was almost identical for a few companies and I now have pro cards for MAC, Urban Decay and Bobbi Brown.
Urban Decay's was the easiest by far, you can submit basically the same documents but they prefer it to be done via email, I was approved for my pro-discount literally the very next day. The discount amount is 40% and the only bad thing about this program is you are only allowed to use your discount online and it restricts MANY items (like no NAKED Palettes!). So it's definitely worth your time because it takes almost no time, but it still is kind of a bummer that it's so limiting. Especially since so many artists have the naked palette in their kits...
Bobbi Brown was also the same process and the discount of 40% can only be used when purchasing items online. But to my knowledge it applies to all products, which is great because their pro-palettes are in the $250.00 range with is incredibly expensive, so the discount sort of brings it down to normal range.
Currently, I am working on getting the Makeup Forever Pro card, but they do not accept the letter of reference so I'm going to look through their required documents and see what I can do to apply.

So that's my experience! Kind of drawn out but I just wanted to make you all aware that you do not have to pay full price if you are a working artist and looking to expand your kit! If you have any stories, questions or comments about this, please share.
Updated Face Cleansing Routine
Monday, July 23, 2012
Happy Monday Everyone!
This post if going to be half face routine, half review of The Body Shop's Tea Tree line of face cleansing products, enjoy! Comment or email if you have any questions :)
About two months ago I was on the hunt for a cleanser to put my skin in check and clear up any unwanted acne that I had recently been experiencing. I asked around and my cousin purchased the Tea Tree set from The Body Shop and told me that it was working amazing for her skin. She wears a great deal of makeup like I do on a regular basis so I figured I would give the products a shot. At the time they were having a sale of buy 3 get 2 free. So I purchased the Foaming Face wash, the Blackhead clearing scrub, Toner, Face Lotion and the Mask. I have been using these products for the entire 2 months and I would say the only things worth purchasing again are the toner and the mask, which is why they are now apart of my routine. The foaming cleanser did not take off my makeup the way I had hoped and the scrub was hardly scrubbing anything off. I like my scrubs to be filled with little tiny beads so they really work their way into my skin. This scrub had very few beads and they were sort of large and seemed to not be able to do the job I wanted them to. Also be warned that this entire line burned/tingled my skin when I applied them, especially the lotion. To me it was extremely drying and when applied on top of blemishes it burned so bad I almost couldn't take it. I would say the lotion was my least favorite purchase of all. However, I did fall in love with the toner and the face mask. The toner leaves your skin feeling amazingly fresh, but also it isn't too drying. Once I wipe my skin with it, there is still plenty of moisture left so that I am not applying my moisturizer onto dry skin. Also the mask is amazing, it tingles the skin in a good way and feels very refreshing. Once removed it leaves your skin feeling clear and super soft.

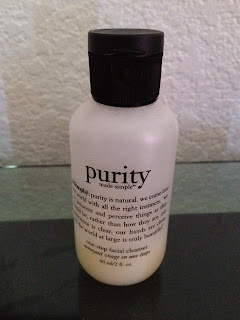

Since I was really disappointed with the cleansers I started rummaging through the drawers in my bathroom to see what else I could use to wash off my makeup and I came across a travel size bottle of Purity by Philosophy. I used this product years ago and I do not remember why I switched cleansers, I forgot how amazing it is. It takes off makeup with ease, it's gentle and works well with every skin type, and it smells amazing! So I back to claiming this as my go-to cleanser. Once I was my face with this, I tone with the Tea Tree toner, and if need be I apply the Tea Tree Mask (I do this about once every 4 days or so). Finally, I apply a moisturizer. For a while I had been using Lubriderm's moisturizer for dry skin and it was working great because there were no harsh scents and it didn't irritate my skin. But after hearing some great things about MAC's Studio Moisture Cream I gave this is a shot and I'm so happy I did! I really can't say enough about how much I'm in love with this moisturizer. It smells amazing, it's so silky and creamy and it hydrates like nothing I've ever used. I apply it at night and in the morning and my skin is so soft with no signs of dryness. When I use it in the morning I give it a few minutes to dry and set into my skin, then I apply a primer and do my face routine and I'm really happy with how my skin is clearing back up. Though I have a tendency to switch my routines up, I really want to stick with this one because so far it's working out great!


This post if going to be half face routine, half review of The Body Shop's Tea Tree line of face cleansing products, enjoy! Comment or email if you have any questions :)
About two months ago I was on the hunt for a cleanser to put my skin in check and clear up any unwanted acne that I had recently been experiencing. I asked around and my cousin purchased the Tea Tree set from The Body Shop and told me that it was working amazing for her skin. She wears a great deal of makeup like I do on a regular basis so I figured I would give the products a shot. At the time they were having a sale of buy 3 get 2 free. So I purchased the Foaming Face wash, the Blackhead clearing scrub, Toner, Face Lotion and the Mask. I have been using these products for the entire 2 months and I would say the only things worth purchasing again are the toner and the mask, which is why they are now apart of my routine. The foaming cleanser did not take off my makeup the way I had hoped and the scrub was hardly scrubbing anything off. I like my scrubs to be filled with little tiny beads so they really work their way into my skin. This scrub had very few beads and they were sort of large and seemed to not be able to do the job I wanted them to. Also be warned that this entire line burned/tingled my skin when I applied them, especially the lotion. To me it was extremely drying and when applied on top of blemishes it burned so bad I almost couldn't take it. I would say the lotion was my least favorite purchase of all. However, I did fall in love with the toner and the face mask. The toner leaves your skin feeling amazingly fresh, but also it isn't too drying. Once I wipe my skin with it, there is still plenty of moisture left so that I am not applying my moisturizer onto dry skin. Also the mask is amazing, it tingles the skin in a good way and feels very refreshing. Once removed it leaves your skin feeling clear and super soft.


Back to having clear skin!
Review: MAC Studio Sculpt Foundation
Thursday, July 12, 2012
Okay Folks, it's review time!
Studio Sculpt Foundation by MAC now holds a special place in my heart. I've even set aside my beloved Laura Mercier Creme Foundation for it. Ideal for dry skin, Studio Sculpt is a full coverage foundation with a dewy finish. If you have dry skin you probably know that it's difficult to find a full coverage foundation that looks dewy as well, but I love that this product was able to do both. And one of my favorite things about it is you really don't even need a lot of product to get the coverage you need, especially now that it's summer time. What I have been doing with it lately is mixing it with some fix + spray and applying with a foundation brush and it goes on a little more sheer but still has great coverage. I then set it with either some translucent powder or my Mineralized Powder Foundation by Sephora to get a nice sheen while still preventing the foundation from running off my face in the heat. Really the only complaint I have about it is the smell, but most of their foundations smell pretty bunk.

I'm also a really big fan of the way it's packaged. It's in a squeeze tube so you don't contaminate the product by double dipping, but also so none goes to waste because you can squeeze out the last drop, unlike bottles.
 So overall I give a big thumbs up to this foundation. Definitely my new favorite for full coverage and based on how long I've had it and how little I've had to use, I predict it will last me a while as well.

Studio Sculpt Foundation by MAC now holds a special place in my heart. I've even set aside my beloved Laura Mercier Creme Foundation for it. Ideal for dry skin, Studio Sculpt is a full coverage foundation with a dewy finish. If you have dry skin you probably know that it's difficult to find a full coverage foundation that looks dewy as well, but I love that this product was able to do both. And one of my favorite things about it is you really don't even need a lot of product to get the coverage you need, especially now that it's summer time. What I have been doing with it lately is mixing it with some fix + spray and applying with a foundation brush and it goes on a little more sheer but still has great coverage. I then set it with either some translucent powder or my Mineralized Powder Foundation by Sephora to get a nice sheen while still preventing the foundation from running off my face in the heat. Really the only complaint I have about it is the smell, but most of their foundations smell pretty bunk.
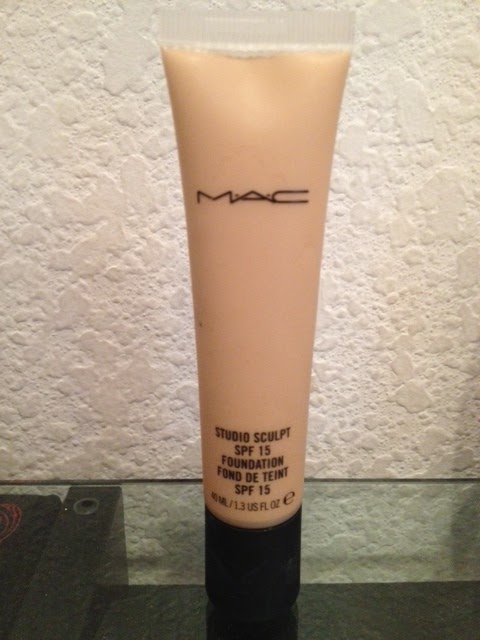
I'm also a really big fan of the way it's packaged. It's in a squeeze tube so you don't contaminate the product by double dipping, but also so none goes to waste because you can squeeze out the last drop, unlike bottles.

Below: Here I am wearing it with Sephora powder on top and some bronzer. At this point it had been on my skin for about 3 hours. The coverage is full and natural looking.

Nordstrom/Sephora Haul
Monday, June 25, 2012
Happy Monday Everyone!
This past weekend after much debate, I decided to take back my Clarisonic Mia2. I had stopped using it for about a week to give my skin a break, then when I went to use it again I broke out again! I thought what a waste of money, so I took it back to Nordstrom and redeemed it for a whole bunch of goodies that I could actually benefit from! Also, a few weeks back I cashed in some of my rewards points from one of my credit cards and they sent me a $50 Sephora gift card, so I had some fun with that as well.

.JPG)
At Sephora I settled on Benefit's gift set that came with Bella Bamba blush (full size), Eye Bright, High Beam, and Stay Don't Stray. I had originally intended to pick up an Urban Decay Primer Potion but when I saw this I gave it a shot because of all that it comes with, and I had been meaning to try Stay Don't Stray to see if it is a good primer, so I'll be doing a review on that soon. Also, I was super stoked on the High Beam because it's a mini version but you really don't need much when using it (just a few dabs on the cheek bone or under your eye brow, so for that price ($38) I thought it was worth it. And the Naked 2 Palette is a gift for my Step Mom, her birthday is this Friday. So I didn't open it up to get any swatches, but there are so many reviews on this palette I didn't really think it was necessary.
.jpg)
One of the things I was most excited about was the Sephora brand blush/bronzer face powder (above) went on sale! I remember when I stopped working seasonal there in February they had just released them and I had my eye on them ever since, the price dropped down to $7 so I snagged one. The colors blend together really nicely and the product is HUGE! I'm sure it will last a long while.

With my Nordstrom credit I really didn't have to think too much about what I wanted because ever since the trend show I attended I have been dreaming about the Valentina perfume by Valentino so I picked it up. It's a very light floral, not overpowering at all. It's wearable on a daily basis and my dad hasn't told me that the smell is obnoxious or overpowering yet (he tends to do that, especially when I wear Chanel) so that's definitely a plus. I love it for summer.

I also decided to grab one of MAC's Cremeblend blushes in So Sweet So Easy. This is the blush that Laura used during the seminar and it looked really great on here. She also informed us that MAC reformulated their Cremeblend blushes (remember when they were super sticky and thick?) to be more like a moose texture and when you dip your brush in it you don't get this huge gooey blob of color, it comes out really nice and light.
.jpg)
.jpg)
Finally, I grabbed the NARS lip color in Cruella. I spoke about this in my previous post, amazing red lipstick!

Red Lipstick Smackdown!
Friday, June 22, 2012
A great red lipstick never goes out of style. A red lip and some mascara is typically my go to look on a daily basis. It's little enough work when I'm feeling lazy and I look "done up" enough to get a little attention ;). So I decided to make a post about my favorite red lipsticks. My first love was Viva Glam I. I actually think this is the first MAC lipstick I've ever purchased, and I think since then I've gone through about 3 of them. But in my makeup adventures I have discovered many more awesome ones. Here is a list of my favorites
1. Barcelona by Buxom- Not only is the color on this amazing (it's more of a deep/ blue red than a bright orange which I prefer) but it boosts the size of your lips and leaves them feeling cool and minty. It also has a bit of a gloss finish to it if you don't want the completely matte look.
2. Cruella by NARS- Right not this is my absolute favorite lip color. It's a deep red with a perfectly matte finish and the pencil makes it so easy to apply. It also looks great on all skin tones.
3. Ruby Woo by MAC- I like this color because it's brighter and super matte (can you tell I like matte reds?) I keep this one in my purse at all times.
4. Viva Glam I by MAC- This one is very similar to NARS, but the NARS one is a bit less shiny. And I think this one is slightly deeper, but like I mentioned before this is my first love and I think it looks great on everyone.


Above: Me rocking my favorite, NARS Cruella <3
My MAC Seminar Experience
Thursday, June 21, 2012
Happy Thursday Everyone!
This past weekend (I'm late I know, it's almost the next weekend!) was very eventful for me, with it being Father's Day weekend and all, but it really all got started on Friday when I drove all the way from the Inland Empire to Canoga Park (about an hour and a half drive) for a MAC makeup seminar with Laura Arellano, but she is better known for her Instagram name @Loreleicakes. If any of you follow her on Instagram you may have seen that she created a seminar for any of her followers in the LA area to come to her location and learn her face routine. Upon seeing this I inquired about it right away. I really LOVE her work and felt it was a great opportunity to see how she does what she does. I learned after a few emails that in order to reserve my space I needed to make a $50 reservation that would be used toward MAC purchases.
So I arrived a bit early for the seminar and when I reached the MAC counter in Nordstrom a woman escorted me to where Laura was sitting. She greeted me with a hug and was super friendly. I chatted with her and the other artist who would be demoing for the day whose name was Ilene, and another woman who was there for the class. Once everyone got to the store we walked up to a private room that was set up with chairs and a stage. They also provided us with a notebook, face charts, eye chart, and a full list of their face routine rundown which included all the products, the order in which they were being used and all the brushes they used. The seminar lasted for a little under 2 hours and it was very informative and fun to see how these pros put their faces on. It was an intimate setting so it made it comfortable to ask questions. and I was sitting in the front row about 2 feet away from the artists so that made it easier to see their techniques.
I picked up a few very helpful tips, I was mainly interested in how she does her eyebrows! They're perfect, and though I didn't completely succeed at recreating them when I went home, I now know how and I'm working on it :).
I had a great time and met some cool people but the only thing I would say was a little irritating about the whole thing was the whole time I felt more like they were just trying to sell us product rather than really teach us anything. But I mean, they were still on the clock at work and they make commission so I can't hate on their hustle because they made a nice chunk of change off of use for just being there for 2 hours. I was proud of myself though, I spent about $94 in total (this includes the $50 I used to reserve my space, so the damage wasn't too great. Overall it was an experience and it's cool to be able to say I met and learned something from her. I just wish that my last impression of the experience wasn't me sitting in traffic for 3 hours trying to get home, but I knew what I was in for!
Also I'll be making a separate post very soon about my purchases and give some reviews on things since I've had a few days to test them out.


 Above: Full list of products and brushes, and some Instagram names I wanted to remember. Shout out to @itzpeechezyo! Follow her on Instagram, she took the class with me and she was super awesome. Glad I got the chance to meet her. And if you haven't read it in my contact tab, follow me too, duh!! @mandy_apple

This past weekend (I'm late I know, it's almost the next weekend!) was very eventful for me, with it being Father's Day weekend and all, but it really all got started on Friday when I drove all the way from the Inland Empire to Canoga Park (about an hour and a half drive) for a MAC makeup seminar with Laura Arellano, but she is better known for her Instagram name @Loreleicakes. If any of you follow her on Instagram you may have seen that she created a seminar for any of her followers in the LA area to come to her location and learn her face routine. Upon seeing this I inquired about it right away. I really LOVE her work and felt it was a great opportunity to see how she does what she does. I learned after a few emails that in order to reserve my space I needed to make a $50 reservation that would be used toward MAC purchases.
So I arrived a bit early for the seminar and when I reached the MAC counter in Nordstrom a woman escorted me to where Laura was sitting. She greeted me with a hug and was super friendly. I chatted with her and the other artist who would be demoing for the day whose name was Ilene, and another woman who was there for the class. Once everyone got to the store we walked up to a private room that was set up with chairs and a stage. They also provided us with a notebook, face charts, eye chart, and a full list of their face routine rundown which included all the products, the order in which they were being used and all the brushes they used. The seminar lasted for a little under 2 hours and it was very informative and fun to see how these pros put their faces on. It was an intimate setting so it made it comfortable to ask questions. and I was sitting in the front row about 2 feet away from the artists so that made it easier to see their techniques.
I picked up a few very helpful tips, I was mainly interested in how she does her eyebrows! They're perfect, and though I didn't completely succeed at recreating them when I went home, I now know how and I'm working on it :).
I had a great time and met some cool people but the only thing I would say was a little irritating about the whole thing was the whole time I felt more like they were just trying to sell us product rather than really teach us anything. But I mean, they were still on the clock at work and they make commission so I can't hate on their hustle because they made a nice chunk of change off of use for just being there for 2 hours. I was proud of myself though, I spent about $94 in total (this includes the $50 I used to reserve my space, so the damage wasn't too great. Overall it was an experience and it's cool to be able to say I met and learned something from her. I just wish that my last impression of the experience wasn't me sitting in traffic for 3 hours trying to get home, but I knew what I was in for!
Also I'll be making a separate post very soon about my purchases and give some reviews on things since I've had a few days to test them out.
Photo Credit: @loreleicakes via Instagram
Photo Credit: @loreleicakes via Instagram
Also the look above it basically what she showed us how to do in the class, just a little more fancy :)
I also thought it was cool that when we walked in they had notebooks, face charts and a full list of all the products and brushes used in the demonstration. But I'm a lil bummed that I didn't get any pics of them while they were up on the stage doing their makeup, but they asked us not to take pictures (cuz they didn't have a face on through most of the demo) so we obliged. I only got a shot of the aftermath!

Above: the book for notes they provided

Above: Empty face chart, can't decide what look I wanna use on it...

Below: The AFTERMATH!

Nordstrom Trend Show
Saturday, May 12, 2012
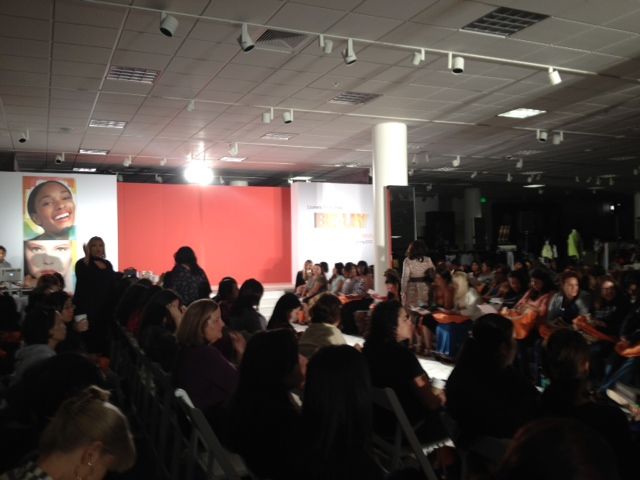
Below: Main stage of the show
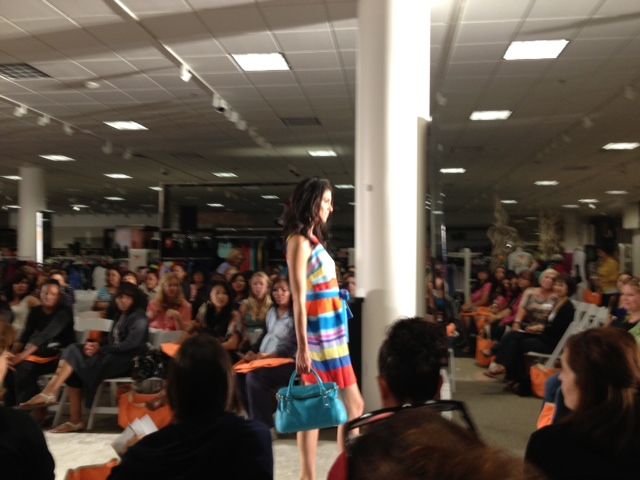
Below: First model on the Runway!
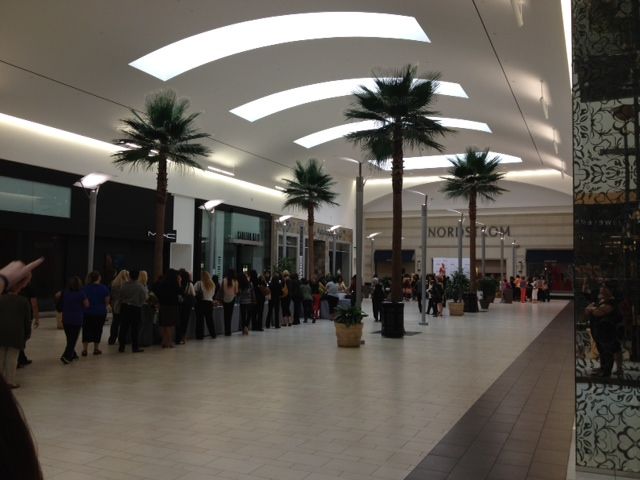
Below: Us waiting in line for coffee and an introduction
The biggest surprise for me was seeing what Smashbox had in store. They brought with them world renound photographer, Steven Khan to the store and if you made a $100 Smashbox purchase you were able to reserve a photo session with him after you got your makeup done by the Smashbox team, very awesome!
Above: Steven Khan shooting the models coming down the runway
After the runway event everyone headed downstairs to check out the vendors and make some purchases. And honestly by this point I was super overwhelmed! There were so many great options, but I had already purchased my Clarisonic and was not looking to make any other drastic purchases, so I stayed where I was comfortable and headed to the MAC counter, and I'm so glad I did because I was approached by MAC Senior Artist and presenter for the show, Cynthia Rivas. She complimented me on my look and asked me if I was an artist (a major compliment coming from her) and we chit chatted for a bit about Makeup. So awesome meeting her! I wish I would have gotten a picture, she is extremely tall and beautiful on top of her being talented.
After this experience I walked around the store a few times, picked up some free goodies and pretty much made my way out. Overall it was an awesome experience filled with fun and beauty and I'm glad I went. So here are some pictures of what I picked up...
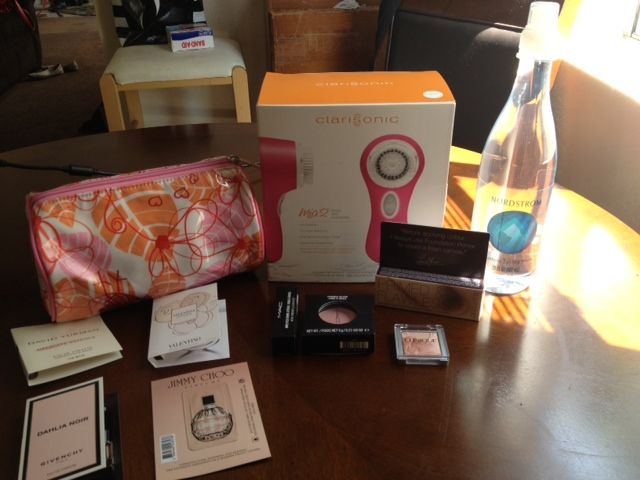
Left to right: Perfume samples of David Yurman- Delicate Essence, Valentino- Valentina (my FAVORITE!), Givenchy- Dahlia Noir, and Jimmy Choo. Then my Clarisonic Mia 2 with my free carrier bag as well as an extra brush head for Normal skin types. I also picked up Girl About Town from the MAC Sets collection, and Well Dressed blush. Then I have my free 30 day supply of the Laura Mercier foundation primer that I already have and love, so I'm glad I have a travel size now. Then my free Peony blush by Clinique. And my Nordstrom water bottle! I thought it was cute :)
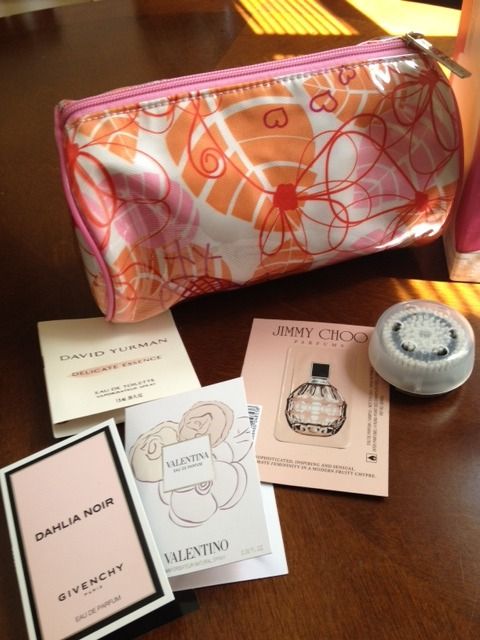
Perfume samples and my Clarisonic travel bag, I love it! The inside lining is waterproof, perfect for the brush or even to carry makeup.
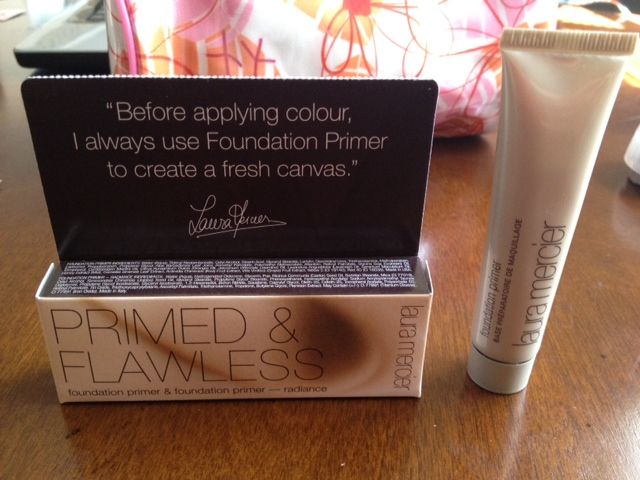
Super Sample of the Primer
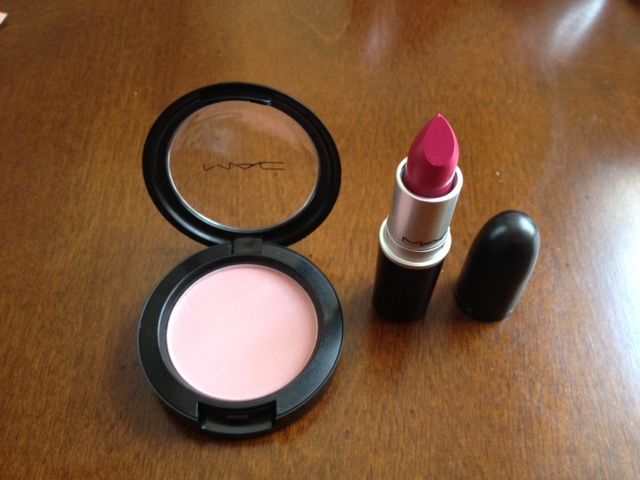
MAC Well Dressed and Girl About Town Lipstick
P.S. I'm going to be writing about my experience with the Clarisonic so stay tuned for that... Hope you all have a wonderful Mother's Day weekend.
Review: MAC Prep + Prime Lip
Tuesday, April 3, 2012
It's kinda funny that my first review of a product after I mentioned working at Sephora isn't even sold at Sephora, but it's definitely worth mentioning which is why I'm bringing it up. And also I'll note that if you're looking for any other product similar to this at Sephora, the only one available is by Too Faced and it's called Lip Insurance. I personally haven't used it, but I haven't heard any great things about it.
The MAC Prep + Prime Lip is awesome if you have trouble with your lipstick bleeding onto your skin or getting on your teeth. It comes in a tube similar to a lipstick and you just glide the product on your lips. I was also given a tip from a woman at the counter that told me to to put the product also around the edge of my lips to really stop the color from bleeding, and that tip really works! I have a serious issue with bleeding and I feel like on many occasions I had product on my teeth. Now since using this I won't wear lipstick without it because I just don't want to have to worry.
Price: $15.00
Overall Rating: 10/ 10

The MAC Prep + Prime Lip is awesome if you have trouble with your lipstick bleeding onto your skin or getting on your teeth. It comes in a tube similar to a lipstick and you just glide the product on your lips. I was also given a tip from a woman at the counter that told me to to put the product also around the edge of my lips to really stop the color from bleeding, and that tip really works! I have a serious issue with bleeding and I feel like on many occasions I had product on my teeth. Now since using this I won't wear lipstick without it because I just don't want to have to worry.
Price: $15.00
Overall Rating: 10/ 10
